Polygeyser Installation Assembly
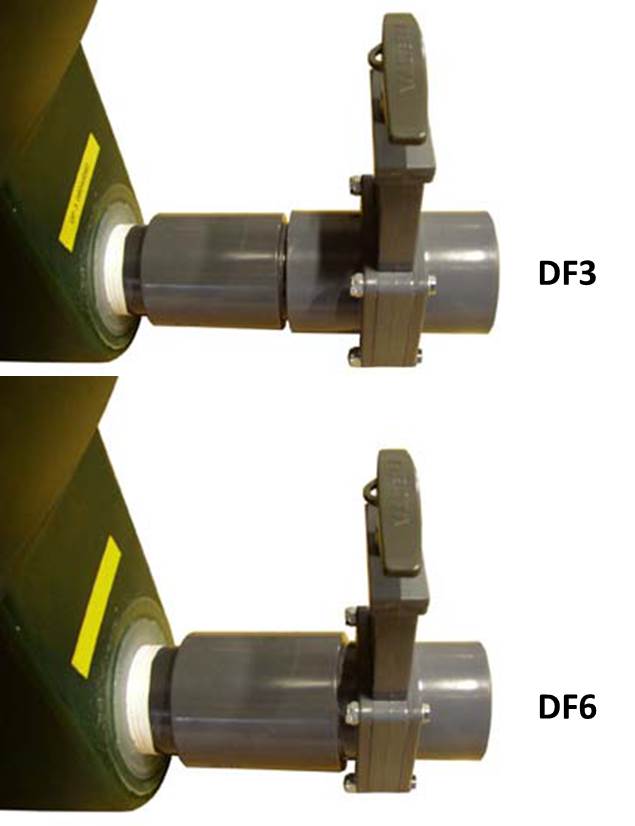
Installation (Models DF-3 and DF-6):
In order for the filter to operate properly, it must be set up on a flat level surface. If the filter is not level, the air charge chamber may “short-circuit”, allowing air to escape from the charge chamber before a complete charge has been established, thus air will continuously burp up through the drop chute. If this occurs the trigger will not fire and the filter will not backwash. To correct this issue, simply level the filter.
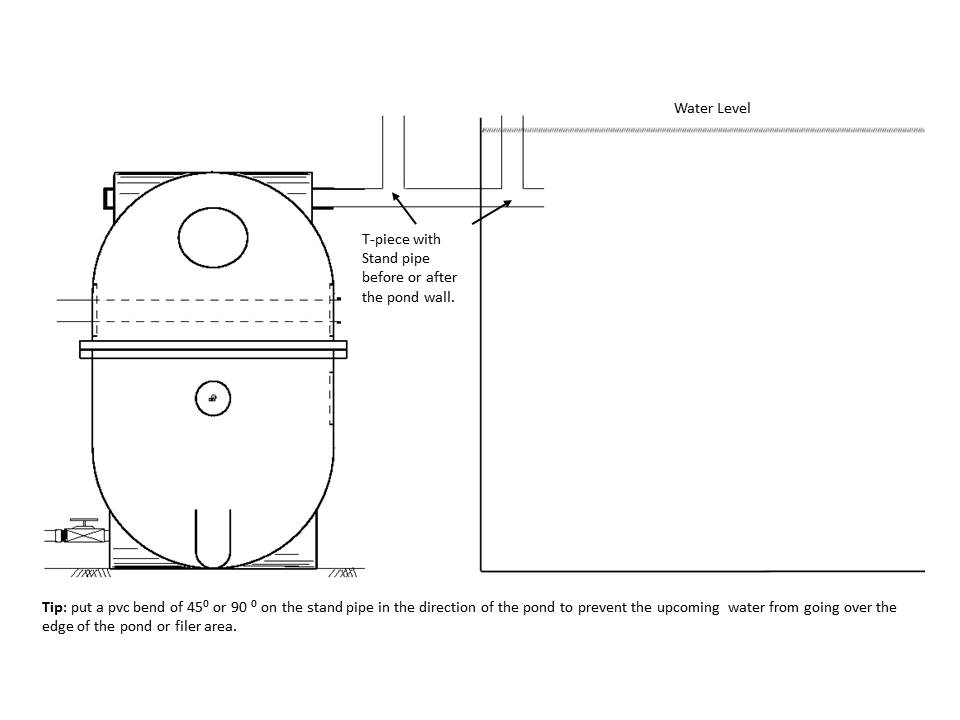
The PolyGeyser® can be installed above or under the water level of the pond. The return to the pond also can be above or under water level. When the return will be installed under water level, air will enter the pond during the backwash procedure. When this air is not appreciated, you can install a T-piece with “standpipe” above the water level in the return pipe. The air will escape through this pipe during backwash. The standpipe can be situated before the pond or in the pond. In the figure we show a schematic drawing of this standpipe:
Pump Connection
The PolyGeyser® comes standard with:
1 x transparent check valve, 2 x reduction socket to 63mm, 2 x white 3” (DF3) or 4” (DF6) endcaps, 2 x black flexible reduction sockets with clamp to connect the pump and the return pipe. (DF6: 2 x reduction sockets 90/110-63).
Be sure the PVC parts are cleaned well before using glue.
Use 63mm PVC pipe and long bends 63mm (optional) instead of short bends (more head pressure).
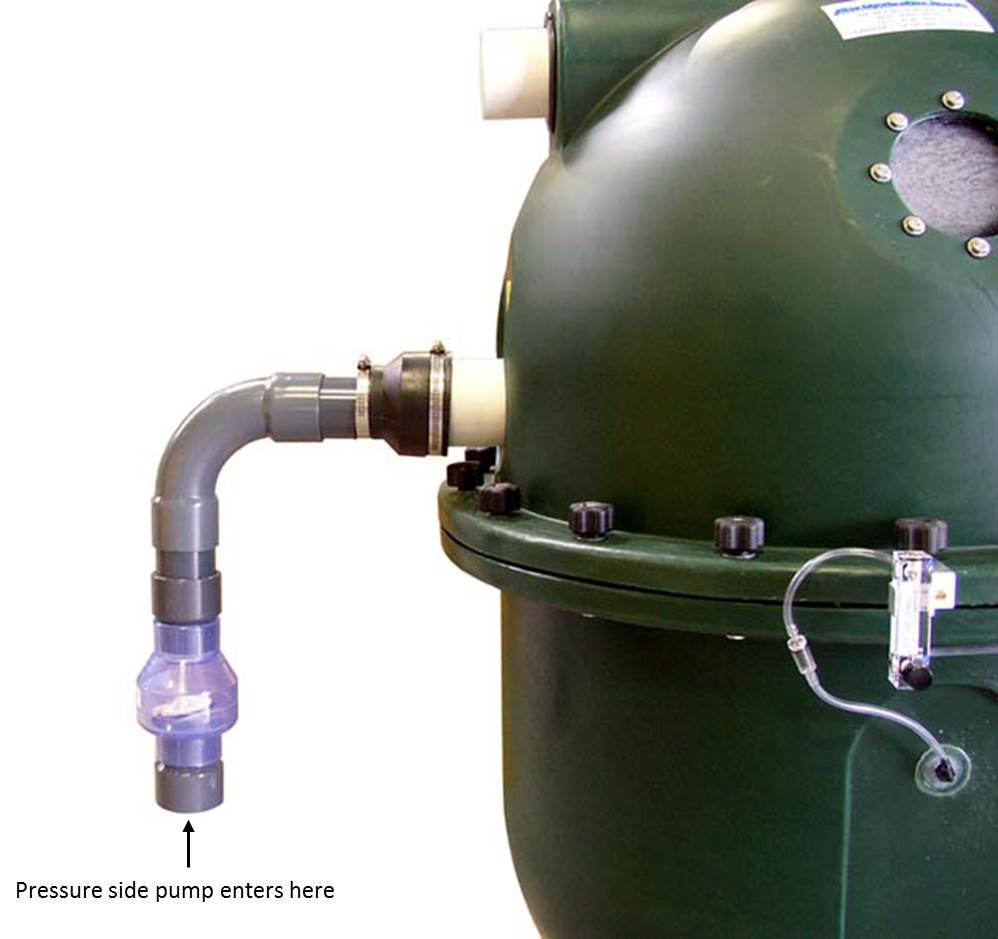
Connect the pressure side of the pump with the reducing socket ofthe check valve. Be sure that the check valve is positioned well (white flap has to be on the lower side, as on the picture) to prevent the beads from going back into the pump.
When it is not possible to install the check valve vertically, you can mount it horizontally. Be sure to position the valve exactly straight when mounting horizontally.
The black flexible connectors are used for connecting the pump and the return pipe. The unused in/outlet will be closed with the supplied white end caps.
Sludge Drain Connection
The PolyGeyser® comes standard with:
1 x Valterra slidevalve 50mm, a piece of pipe PVC pipe Ø50mm (DF3), a reducer socket 1½” inch to 50mm (DF3). The DF6 comes with a reducer from 2” to 63mm where the slidevalve fits in (outer diameter of the slidevalve is 63mm).
Be sure the PVC parts are cleaned well before using glue.
DF3: Attach the reducer socket to the piece of pipe that comes out the PolyGeyser. Connect the piece of pipe in the reducer socket. Connect the slide valve with the pipe.
From the slide valve you can make any further pipe connections.
Connecting the Flowmeter
The PolyGeyser® comes standard with:
1 x flowmeter, 1 x mounting bracket for flowmeter, 5 meter airhose 4 x 6mm, 1 x non return valve 4mm.
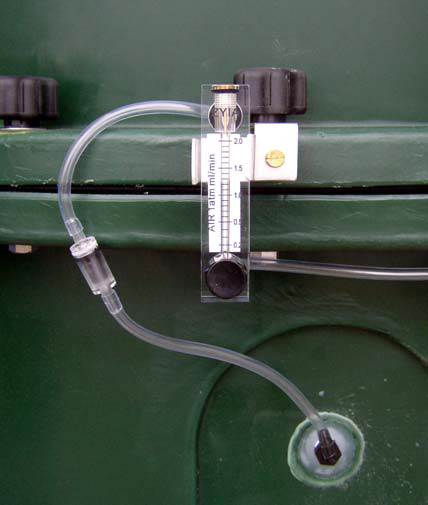
Mount the flowmeter in the bracket. Unscrew one of the screws of the PolyGeyser®. Put the bracket over the threaded part and return the screw. With the supplied air hose, you can connect the air pump to the lower inlet of the flowmeter. The air hose can be put into the flowmeter until it can get no further. To release the air hose, push the blue ring and pull out the air hose. Use a short piece of hose from the upper connection of the flowmeter to the black end part of the non-return valve. Use another piece of air hose to connect the other end of the non return valve to the inlet of the PolyGeyser®. Please check that all connections are tight.
The flowmeter has a range of 0.2 – 2 liter per minute. The amount of air blown into the filter determines the backwash frequency. The optimum frequency of backwash intervals varies with feed loading. The table below
presents recommended backwash regimes and associated air flow rates.